Allocating Consignments to Carriers
Once you've created a consignment, you'll need to allocate it to a carrier service. This section explains how to configure allocation rules that PRO can use when selecting carrier services, and the various methods you can use to allocate consignments to those services.
What Is Allocation?
In the context of SortedPRO, allocation is the process of selecting the carrier service that will be used to deliver a consignment. Allocation is a key part of all PRO workflows, as a consignment cannot be shipped if it has not previously been allocated to a suitable carrier service.
Caution
You can only allocate consignments that are in a consignment state of either Unallocated or Allocation Failed. If you attempt to allocate a consignment that is not in one of those states, PRO returns an error.
To allocate a consignment in PRO, you'll need to call one of PRO's allocation endpoints. You can specify a carrier service to allocate to, allocate based on a quote you received, or have PRO select the cheapest eligible carrier service for you. Whichever endpoint you use, PRO uses pre-defined allocation rules to ensure that your consignment is allocated to a suitable carrier service.
PRO offers the following allocation endpoints:
| Endpoint | Description | API Reference |
|---|---|---|
PUT https://api.electioapp.com/allocation/allocate |
Allocates one or more consignments based on your organisation's custom allocation rules | Link |
PUT https://api.electioapp.com/allocation/{consignmentReference}/allocatewithcheapestquote
|
Allocates a single consignment to the cheapest available carrier service | Link |
|
Allocate Consignment With Service Group PUT https://api.electioapp.com/allocation/{consignmentReference}/allocatewithservicegroup/{mpdCarrierServiceGroupReference}
|
Allocates a consignment to the cheapest available carrier service in a particular carrier service group | Link |
PUT https://api.electioapp.com/allocation/{consignmentReference}/allocatewithquote/{quoteReference}
|
Allocates an individual consignment based on a specific delivery quote from a carrier | Link |
Note
For detailed information on using each of PRO's allocation endpoints, click the endpoint names in the table above.
When a consignment is allocated to a carrier service, its status changes to Allocated, enabling you to retrieve its package labels and (where applicable) customs documentation. PRO also returns an Allocation Summary, confirming the service that the consignment was allocated to and (where applicable) providing tracking details.
What Is an Allocation Rule?
When you make an allocation request for a consignment, PRO uses its allocation rules to ascertain which carrier services are eligible to ship that consignment and which are not. Allocation rules are optional criteria that define the consignments that a particular carrier service is eligible to take. You can specify the following:
- Maximum and minimum dimensions and weight
- Maximum monetary value
- Excluded UK postcode areas
- Excluded countries
- Allocation tags.
For example, you could specify that a particular carrier service should only be allocated consignments that weigh between 1-25 Kg. Subsequently, PRO would not consider this service when allocating a consignment with a weight of 30Kg.
Configuring Allocation Rules
Allocation rules must be configured in the PRO UI. To configure allocation rules:
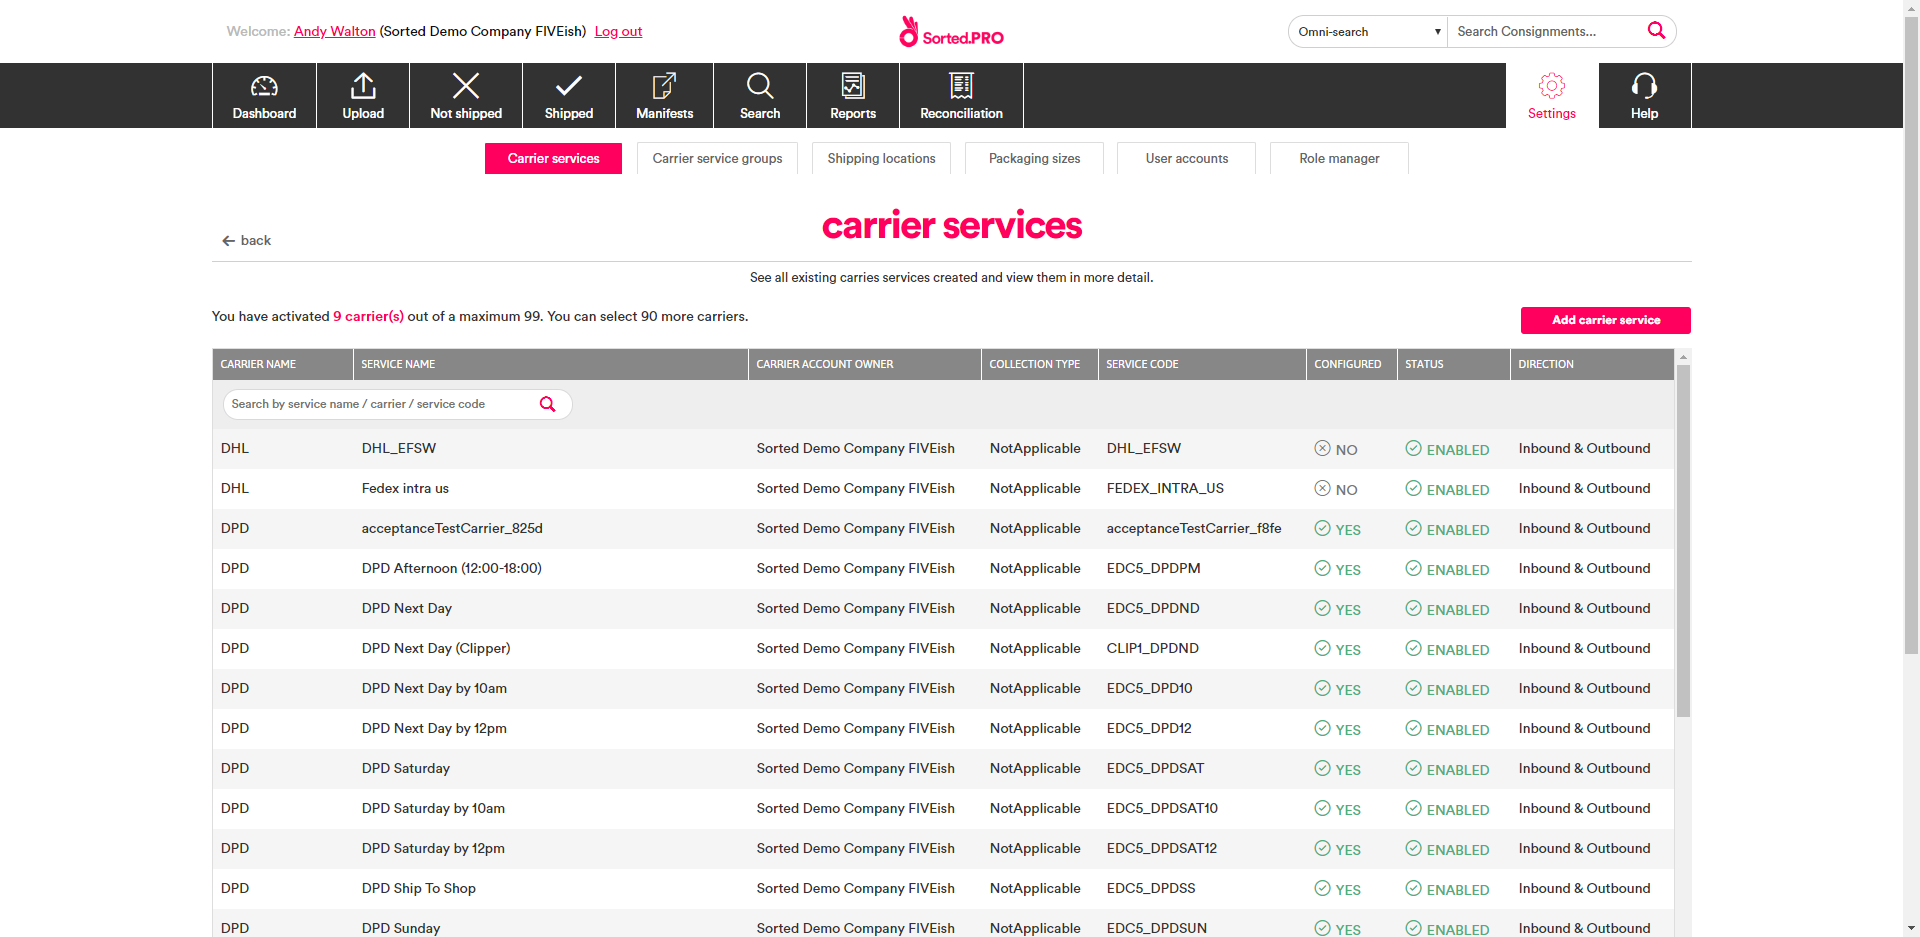
Log in to the PRO UI and open the Carrier Services page (Settings > Carrier Services) to display a list of available carrier services.
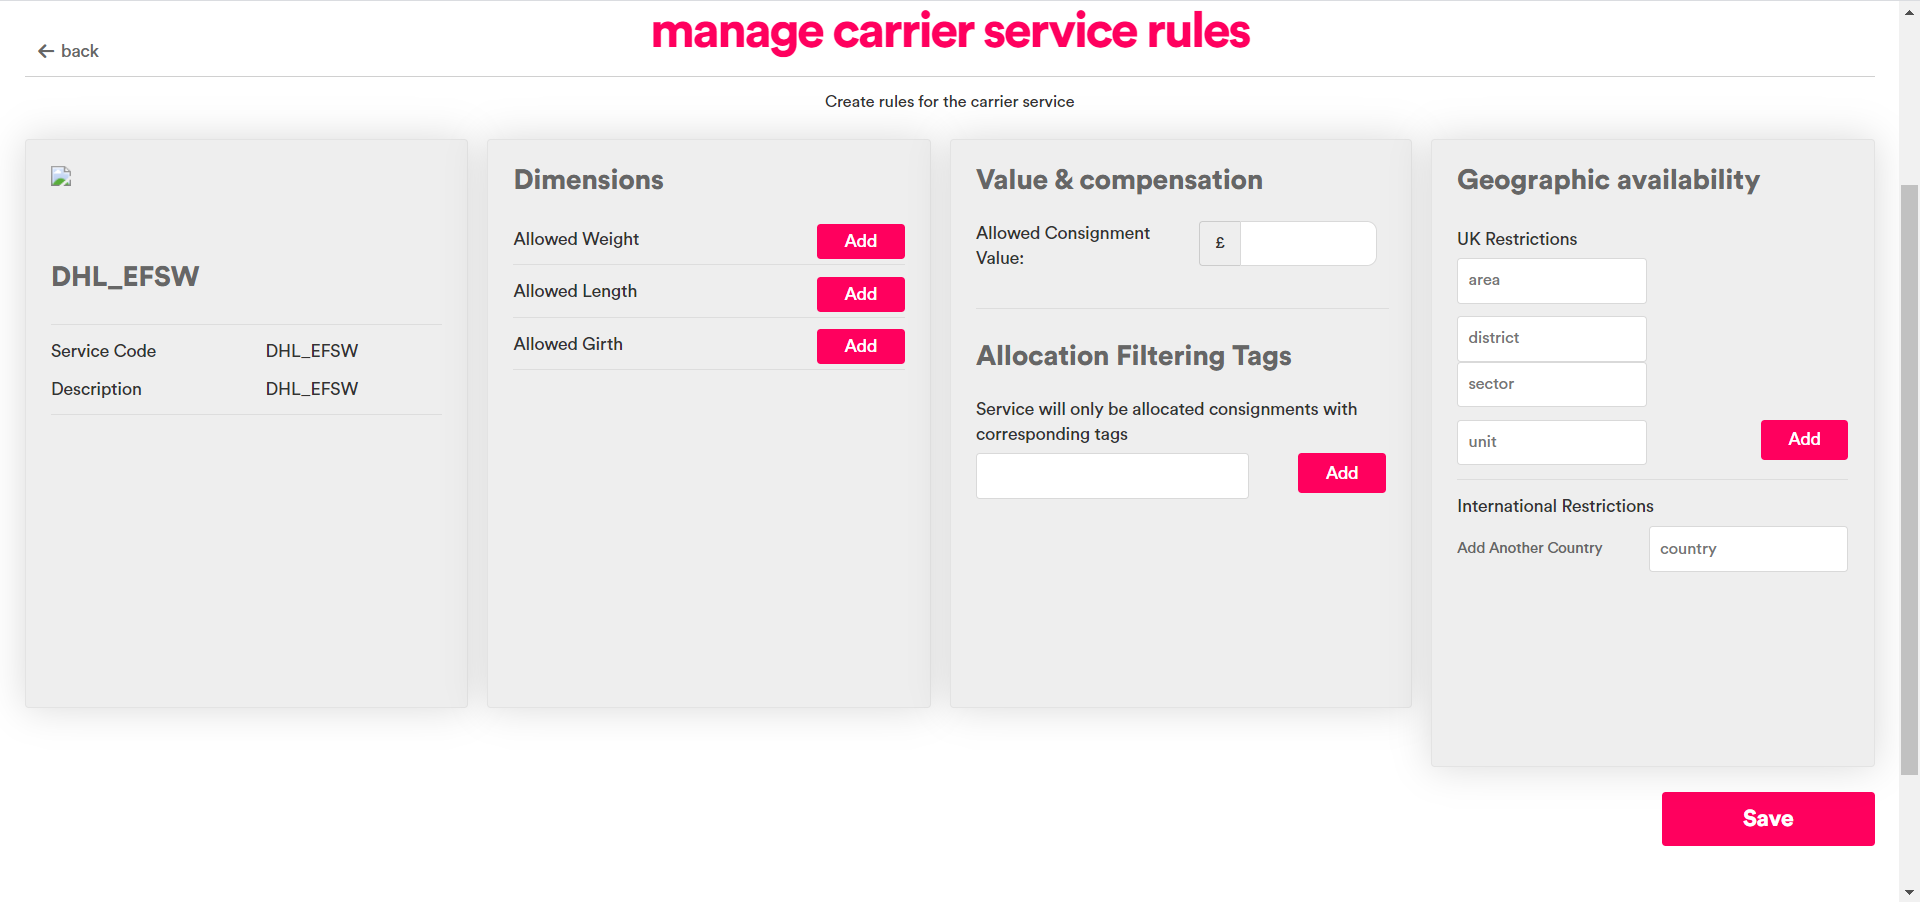
Select the carrier service you want to configure rules for and then click Allocation Rules to display the Manage Carrier Service Rules page.
If required, enter maximum dimensions or weights. To do so:
In the Dimensions panel, click Add on the rule you want to set up (one of Allowed Weight, Allowed Girth, or Allowed Length). PRO displays editable range fields.
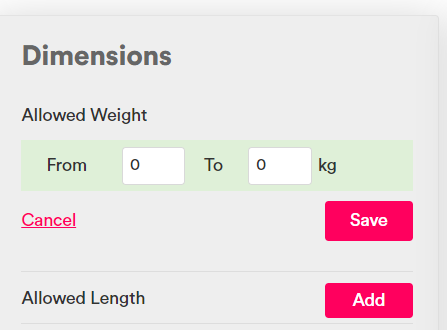
Enter the range values for the rule.
Click Save to confirm your changes. PRO displays your new rule under the relevant field.
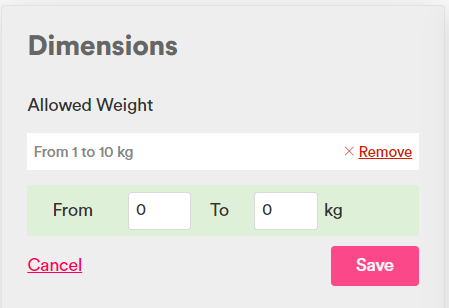
You can edit your new rule using the range boxes, or click Remove to remove it altogether.
If required, enter an Allowed Compensation Value. This is the maximum monetary consignment value that the service can take.
If required, add an allocation tag by entering the tag name into the Allocation Filtering Tags field and clicking Add. PRO will only allocate those consignments that have a corresponding value in their
tagsproperty to the carrier service.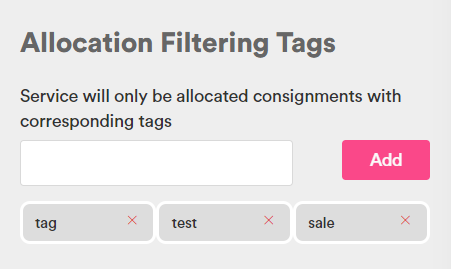
To remove a tag from a carrier service, click the x on its icon.
Note
For more information on how allocation tags work, see What Is an Allocation Tag?.
If required, enter a UK postcode restriction. To do so, enter the postcode area, district, sector, and/or unit you want to restrict delivery to into the fields on the Geographic Availability panel and then click the Add button. PRO displays the restricted postcode area in the panel.
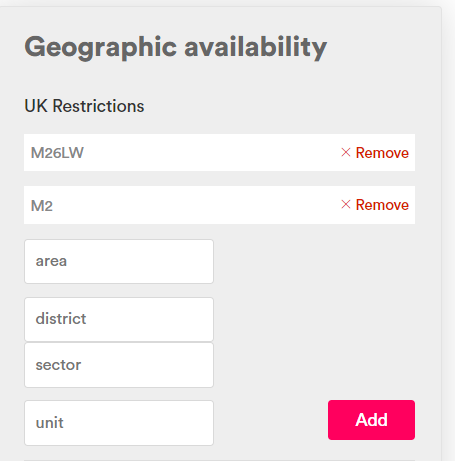
To remove a restriction, click Remove.
Note
The Geographic Availability fields enable you to be flexible when restricting postcodes for a carrier service. For example, if you wanted to prevent a carrier service from being allocated to any consignments bound for the specific postcode M2 6LW, you would enter the following:
- area - M
- district - 2
- sector - 6
- unit - LW
However, if you wanted to prevent the service from being allocated to any consignments bound for the entire M2 postcode area, you could simple enter M into the area field and 2 into the district field, and leave the more specific fields blank.
For more information on UK postcode structures, see this article.
If required, enter international delivery restrictions. To do so, start typing the name of the country you want to restrict delivery to into the Add Another Country field, and then click Add on the relevant country.
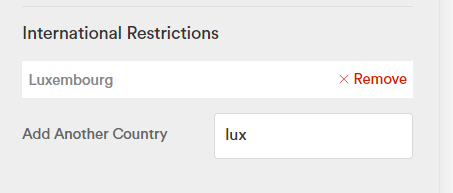
To remove a country from the list, click its remove button.
Click Save to save your changes and finish setting up allocation rules.
What Is an Allocation Tag?
Allocation tags are a type of allocation rule that enables you to filter the list of available carrier services on a per-consignment basis, no matter which allocation endpoint you use in your integration. They are generally used as a flexible means of excluding carrier services that would not be suitable for a particular consignment.
Tagged consignments can only be allocated to those carrier services that have a matching tag. You can still allocate untagged shipments to a carrier service that has tags.
For example, a retailer might use the UI to add a Flammables tag to all the carrier services that they wanted to use for flammable products. They would then add the Flammables tag to all consignments containing flammable products. PRO would only allocate those consignments tagged as Flammables to a consignment in the pre-approved Flammables list.
Configuring Allocation Tags
To associate tags with carrier services, use the Settings > Carrier Services > [select carrier service] > Allocation Rules > Allocation Filtering Tags panel of the PRO UI, as detailed in Configuring Allocation Rules.
To tag a consignment, add the required tag into the shipment's tags property, either at creation or via the Update Consignment endpoint. The tags property is a simple array listing all the tags that apply to the shipment.
The code sample below shows a tags property for a consignment that contains flammable materials, oil and alcohol.
Tags Example
Suppose that you set your carrier services up in the following way:
- You tag Carrier Service A with
Alcohol - You tag Carrier Service B with
Flammables - You tag Carrier Service C with
AlcoholandFlammables - You tag Carrier Service D with
Oil - You don't add any tags to Carrier Service E
This configuration would produce the following results:
- Consignment with no tags - A B C D and E are returned
- Consignment tagged with
Alcohol- A and C are returned - Consignment tagged with
Flammables- B and C are returned - Consignment tagged with
AlcoholandFlammables- C is returned - Consignment tagged with
Alcohol,Flammables, andOil- No services are returned
After Allocation
Once allocated to a suitable carrier service, the consignment's status changes to Allocated, enabling you to retrieve its package labels and (where applicable) customs documentation. All allocation endpoints also return an Allocation Summary, either singularly or (where multiple consignments have been allocated at once) in an array.
The Allocation Summary contains links to the consignment resource that was allocated, a summary of the carrier service that the consignment was allocated to, a link to the relevant package labels, and a ConsignmentLegs array indicating how many legs the shipment will need. Where a shipment would need multiple legs to complete, the ConsignmentLegs array shows tracking details for each individual leg.
In the example, a consignment with a {consignmentReference} of EC-000-05B-MMA has been allocated to a (dummy) carrier service called Carrier X Next Day Super.
Allocation Summary Example
[
    {
        "StatusCode": 200,
        "ApiLinks": [
            {
                "Rel": "detail",
                "Href": "https://api.electioapp.com/consignments/EC-000-05B-MMA"
            },
            {
                "Rel": "label",
                "Href": "https://api.electioapp.com/labels/EC-000-05B-MMA"
            }
        ],
        "Description": "Consignment EC-000-05B-MMA has been successfully allocated with Carrier X Next Day Super for shipping on 14/06/2019 17:00:00 +00:00",
        "ConsignmentLegs": [
            {
                "Leg": 1,
                "TrackingReferences": [
                    "TRK00009823"
                ],
                "CarrierReference": "CARRIER_X",
                "CarrierServiceReference": null,
                "CarrierName": "Carrier X"
            }
        ],
        "CarrierReference": "CARRIER_X",
        "CarrierName": "Carrier X",
        "CarrierServiceReference": "CX_NDS",
        "CarrierServiceName": "Next Day Super"
    }
]
Allocation Section Contents
- Allocating Via Service Group - Explains how to allocate a consignment to the cheapest available service in the specific carrier service group.
- Allocating to a Specific Quote - Explains how to allocate a consignment based on a specific delivery quote from a carrier.
- Deallocating Consignments - Explains how to return a consignment to a deallocated state.
Note
All of the URLs and examples given in this documentation relate to PRO's live production environment. To call APIs in the sandbox environment, substitute the api.electioapp.com portion of the API's base URL with apisandbox.electioapp.com. Don't forget to use your sandbox API key (as opposed to your production API key) when making the call.
For more information on PRO's sandbox, see Using the Sandbox Environment.