Tracking plugin
We have created a plugin that allows you to host your tracking pages externally of Track. This means your customers won't need to leave your website to get their order tracking status and the domain link will not contain the Sorted branding of https://react.sorted.com/tracking/.
For example, you can host the plugin on your own website with a search bar for your customers to type their order number and recieve their tracking updates while they're on your own website.
You can embed your tracking pages on any web page that supports HTML and JavaScript.
Set up the tracking plugin
To display a tracking page, you must first have created a tracking page from inside the Track platform.
Visit our guide on how to create tracking pages for more information.
It's important to consider where and how you want to use the plugin:
- Where will the plugin be displayed?
- What tracking page do you want to use in the plugin?
- How do you want your customers to interact with the plugin?
Eg. Do they need to log in or can they find for their order info using a search bar?
Note
We advise that you work with someone in your organisation who has knowledge of front-end web development or HTML and JavaScript coding to help implement the tracking plugin.
Follow the guide below on how to get the tracking plugin up and running on your domain.
Link to the plugin file
The plugin can be referenced in your webpage by linking to the script externally.
In your web page, insert the following line of code:
<script src="https://reactwebtest.blob.core.windows.net/tracking-widget/react-tracking-page-widget.min.js" defer></script>
Insert the plugin code
The plugin code consists of a <tracking-page> HTML tag which you must insert into your web page.
Data attributes in this tag need to be edited to return a successful tracking response.
View the code sample below and continue the guide to edit each data attribute:
<tracking-page shipment-id="SHIPMENT-ID page-name="TRACKING-PAGE-NAME" customer-id="YOUR-CUSTOMER-ID"" layout-type="standard"></tracking-page>
Edit the data attributes
You need to populate 3 data attritubes in the <tracking-page> tag for the code to work:
1. Identify the shipment
The code requires a unique identifier of the shipment you want to track. You can choose from two data types either the shipment ID or using a custom metadata value that you registered with your shipments.
Depending on how your shipments are registered into Track, you may have to consider the most efficient data attributes to use. Check out the sample code below to view the two types.
Insert shipment id
The code sample below is the <tracking-page> tag including the shipment-id attribute.
Every shipment you register in Track is assigned a unique shipment id. These can be found in the Track platform by clicking an individual shipment and viewing it's registered details.
Replace the "SHIPMENT ID" with the genuine ID of the shipment you want to track.
<tracking-page shipment-id="SHIPMENT-ID" page-name="TRACKING-PAGE-NAME" customer-id="YOUR-CUSTOMER-ID" layout-type="standard"></tracking-page>
Insert metadata values
The code sample below is the <tracking-page> tag including the metadata attributes that can be used to identify a shipment.
If you register your shipments with a unique identifier through metadata, you can use it to display it's tracking information through the code.
Replace the "METADATA-KEY" and it's corresponding "METADATA-VALUE" with data of a real shipment.
<tracking-page metadata-key="METADATA-KEY" metadata-value="METADATA-VALUE" page-name="TRACKING-PAGE-NAME" customer-id="YOUR-CUSTOMER-ID" layout-type="standard"></tracking-page>
2. Choose a tracking page
You must choose a tracking page to display in the plugin. You must have already created and published a tracking page from your Track platform. If you do not have any tracking pages, follow our guide on how to create tracking pages.
To find the name of a tracking page:
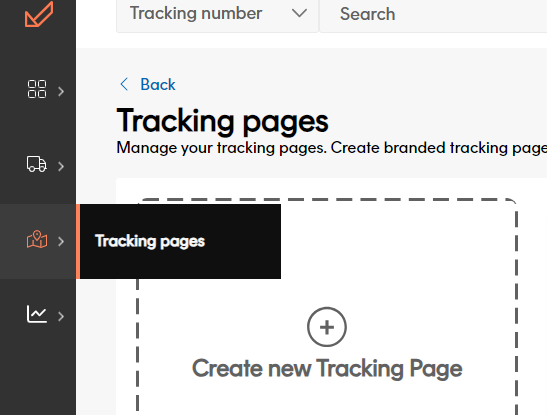
- In Track, on the left, click Tracking pages.

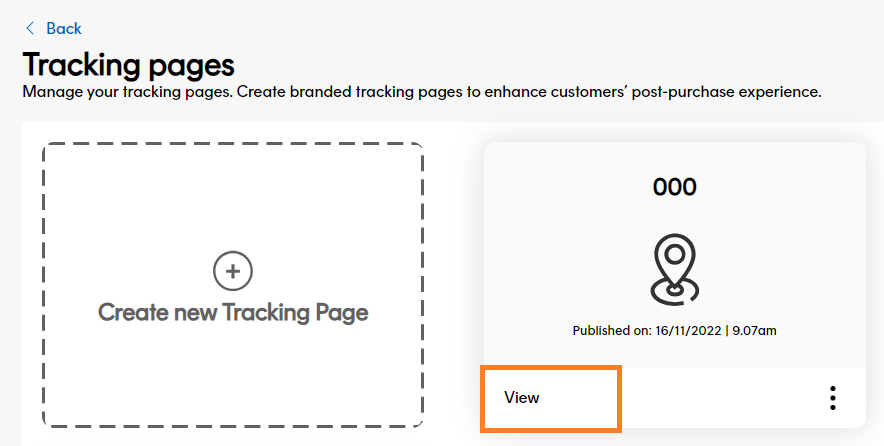
- Click View on a tracking page.

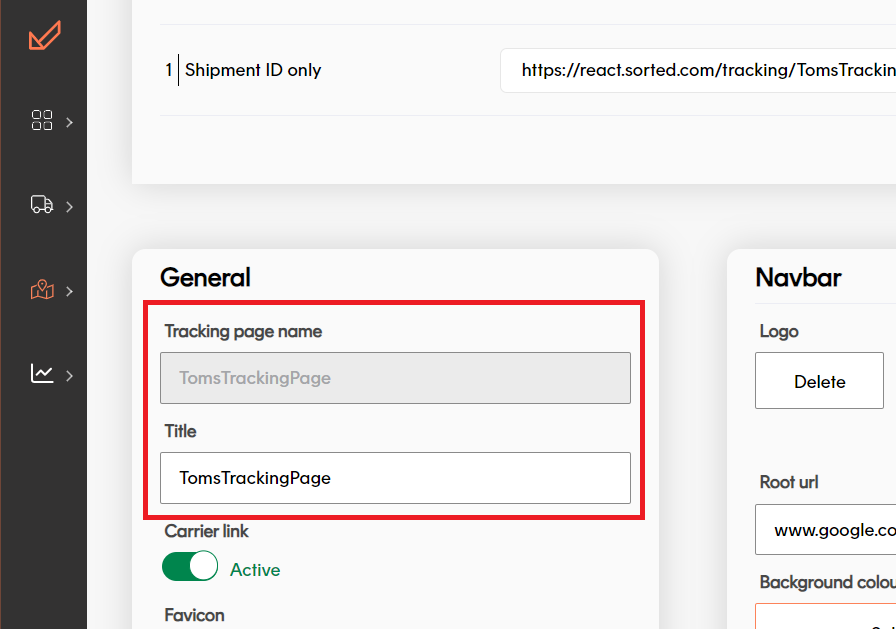
- View the tracking page name in the General tap.

Replace the page-name="TRACKING-PAGE-NAME" with a tracking page name to use in the code.
Eg. page-name="TomsTrackingPage"
3. Insert your customer id
In your Track platform, your customer id can be found inside a tracking page URL.
Follow the steps below to find your customer id:
- In Track, on the left, click Tracking pages.

- Click View on a tracking page

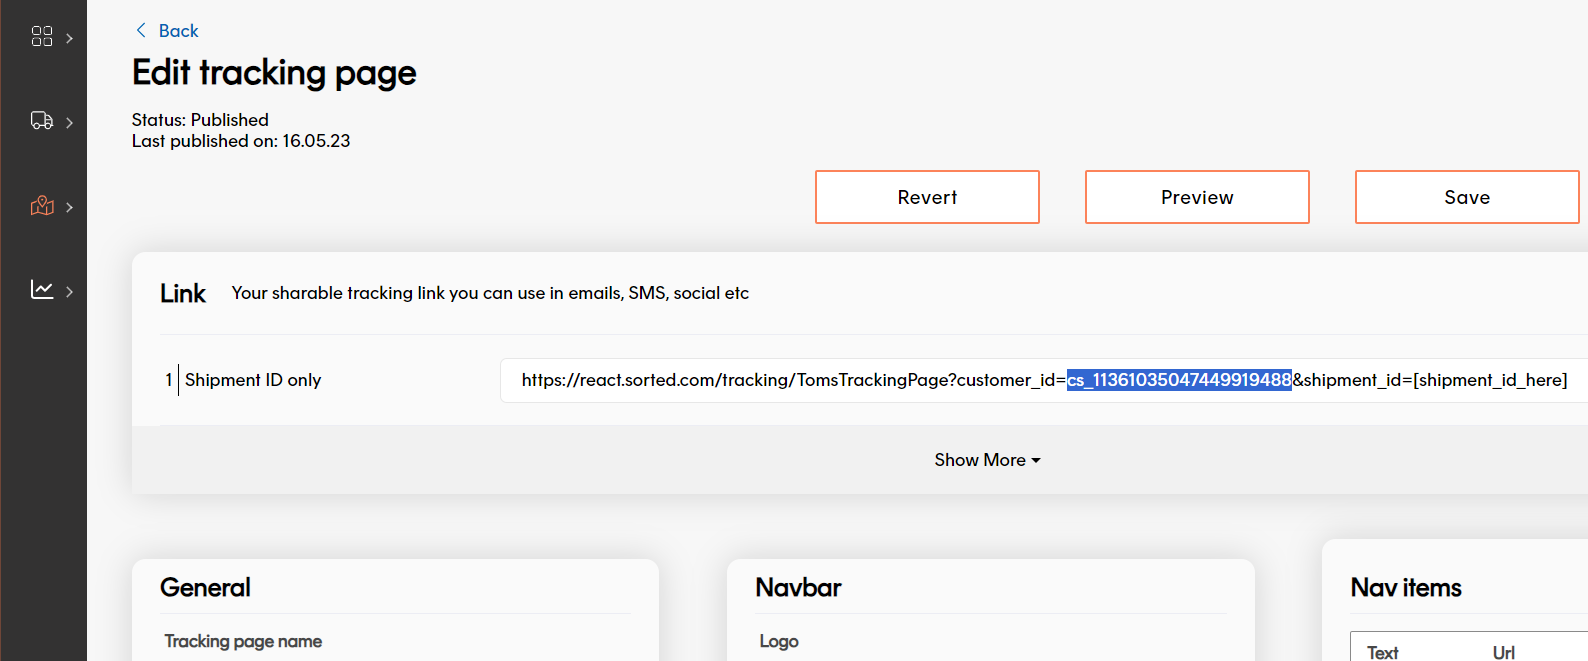
- Your customer ID can be copied from the tracking page URL.
It should look like thiscs_00112233445566778899
Note
You customer ID can also be provided by your Track account manager.
Edit the data attribute customer-id="YOUR-CUSTOMER-ID" so that your customer id is used instead.
View the plugin
If you have followed the instructions above, you should now be able to view the tracking details of a shipment externally of a tracking page using the plugin.
You should have the following lines of code embedded in a webfile with your own data attributes added into the fields.
<html>
    <head>
        <script src="https://reactwebtest.blob.core.windows.net/tracking-widget/react-tracking-page-widget.min.js" defer></script>
    </head>
    <body>
        <tracking-page shipment-id="SHIPMENT-ID" page-name="TRACKING-PAGE-NAME" customer-id="YOUR-CUSTOMER-ID" layout-type="standard"></tracking-page>
    </body>
</html>
Example plugin code functionality
Depending on how you want to implement the plugin, you could:
- Develop a search bar into a webpage that will allow your customers to lookup the status of their orders; OR
- Include the plugin in the customer's login profile to track their orders from there
These suggestions may require some development by the team that manages your website.
Additional attributes to use
Aside from the attributes above that are unique identifiers for your code to work properly, there are other attributes you can include that provide more flexibility over your tracking plugin.
Standard / Mobile
By defaut the plugin displays it's 'standard' layout view for full size screen dimensions.
If you want the tracking plugin to respond to mobile and tablet devices, you must insert the layout-type="mobile" attribute inside the tracking page tag. If your tracking page tag does not contain a layout type, it will default to the standard layout for wider screens.
CSS
To further control the theme and brand of your tracking plugin, you can apply a seperate CSS file to the code by using the css-file="FILE-LOCATION" attribute.
Create a CSS file and set the css-file property to the full url of that file. The file will be applied to the tracking plugin.
If a CSS file is not included, the tracking plugin will follow the same theme and colours of what you've created in the original tracking page.